- Incident administration involves;
- The adding, editing and occasional deleting of incidents
- The linking of incidents to known suspicious persons and/or vehicles. To add suspicious persons or vehicles, see this page.
- Managing the Crime Classifications used in the incident reports, aka Incident Types)
Adding, Editing and Deleting an Incident
- The Incident Reports tab contains a table of the incident reports with the most recent being displayed at the top of the table.
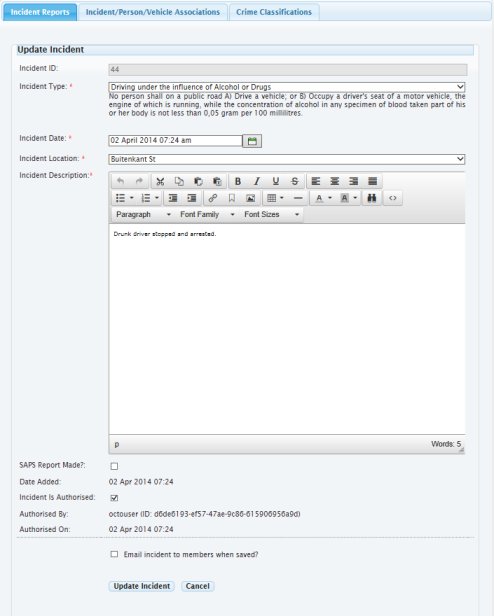
To add a new incident, click the Add New Incident button above the table. To edit or delete an incident, click the corresponding icon to the right of incident in the table. If deleting, you will be asked you to confirm prior to the incident being deleted. If you are adding or editing an incident, clicking the button or icon will produce the following screen;

To add or edit an incident, complete the fields in the image above and click the Add (or Update) Incident button. You may also choose to email the incident when it is saved.
Linking Incidents to Persons and/or Vehicles
-
Before adding an incident association, please ensure the person and/or vehicle you wish to associate with an incident have been added to the system. To learn how to add suspicious persons or vehicles, click here. Take note of the person and/or vehicle database ID as you will require to know them when making the association.
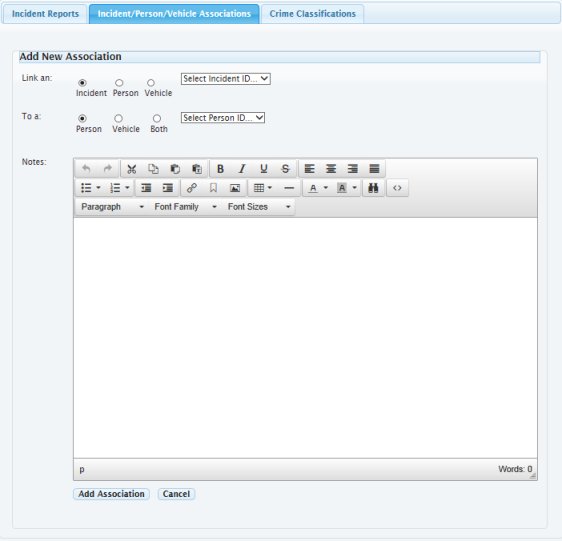
Adding or editing an association is done in much the same way as adding or editing an incident. You either click the Add Association button or click the corresponding icon on the row you wish to edit. You will then get the following screen;

You can choose to link an incident, person or vehicle to another incident, person or vehicle. To do so, just selct the radio button option then, using the corresponding drop down list, select the ID(s) of the associations you wish to make.
When done, click the Add (or Update) Association button to save it.
Managing Incident Classifications
-
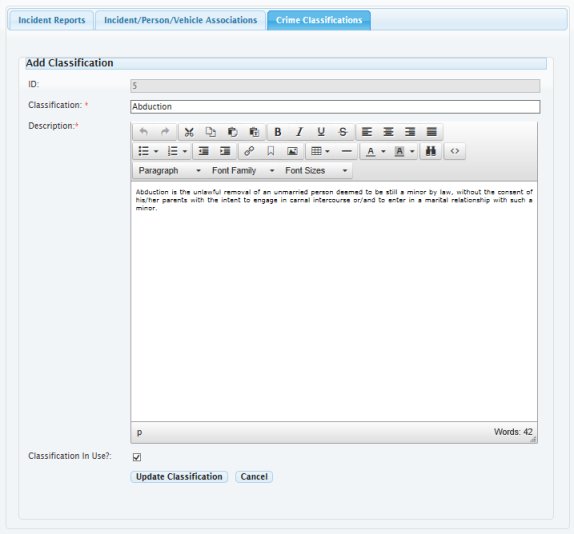
Adding or editing a crime classification follows the same procedure as adding/editing an incident. You either click the Add Classification button or click the corresponding icon on the row you wish to edit. You will then get the following screen;

Simply fill in the fields as required and cick the Add (or Update) Classification button to save it.
Note that if the In Use checkbox is not set, the classification will not be capable of being used to record an incident.