This page contains details of the Email domain and access to these functions should be very strictly controlled by the organisation. There are many options and functions available on the email domain and only expreienced administrators should make changes here because of the very real risk of crashing your email system.
-
There are a total of 15 email addresses the organisation may use. The website has 5 built in addresses and the organisation may add a further 10 if they so require.
Please note that all mailboxes have a maximum storage space of 100MB only. It is therefore crucial that you either forward and delete email as it arrives, or regularly download it through an email client, such as MS Outlook™, that will delete it from the server once it has been downloaded.
The Email setup page has the following fields;
In the event a mailbox reaches it's 100MB limit, it will refuse to accept any more email.

Under most circumstances there should not be any need to make changes to this page. The exceptions to this will be;- You wish to change the password for one of the email addresses
- You wish to change the name of one of the default email addresses to one of your own choosing
Step 1
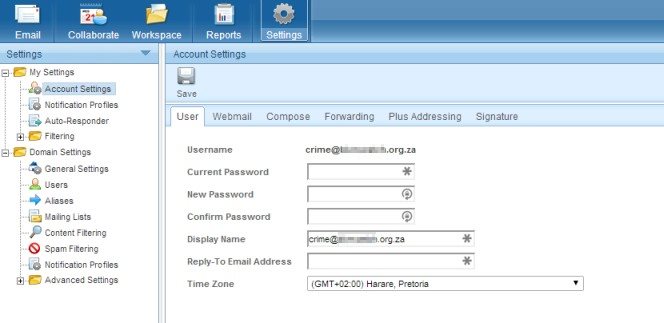
Using the public email address and the corresponding password for it, login to your email domain using the mail host settings in the image above e.g. http://mail.nwwatch.org.za You will be presented with the following screen.Note that the info login is a domain administrator and it is through this login that you may amend any other address as well as add more email addresses if you wish.

Changing Passwords
If you wish to change the password for the Info email address, simply use the fields in the image above. Should you wish to change the password for one of the other addresses, click the users link on the left hand side and then the user you wish to edit. The resulting screen will look almost identical to this one and you follow the same procedure.If you change any of the inbuilt email address passwords here then you must change them on the website as well. The same applies in reverse. In short, the email address passwords must be exactly the same on the website as they are in the email domain. A mismatch will result in the website not being able to send email from the affected address.
Changing the Built-in Email Addresses
If you wish to change one of the built-in address names then you must first create a new email address. To do so;- Click the Users link in the lft hand column under the domain settings folder
- Click the New link at the top of the page
- You will now have a page very similar to the image in Step 1 above. simply complete the fields and click the Save icon.
- Go to your organisations website and change the name and password for the address you wish to change.
- Click the Forwarding tab at the top of the screen and enter the address that all mail sent to this address will be forwarded to. Ensure the Enable deletion of messages on forward check box is set unless you are downloading the inbox to an email client such as MS Outlook™
- Once you have tested and confirmed the new address works, you may delete the original address if you wish.
- If the address you are changing is an old (previously used and established) address then to ensure you continue to receive email
sent to that address you can create an alias. To do this;
- click the Alias link in the left hand pane
- click the New link at the top of the page
- Enter the alias - this will be the address you are deleting
- Click the Email Address(es) tab and enter the email address it is to be forwarded to - this will be the new address you just created
- Click the Save link.
-
Adding a New Address
To add a new address, follow the first 5 steps outlined in the section Changing the Built-in Email Addresses above.